Cloud file sharing: How to send share links with mail.com
Why make things hard when they can be easy? When you save photos and other files in the mail.com Cloud, it is a snap to share them with others. Instead of sending them individually as email attachments, it’s super-easy to share cloud photos and documents using a secure share link.

Online file sharing with a link is very secure, and it eliminates the risk of having your message bounce back because the attachment size is too large, or it has been misidentified as spam. You are not limited to sharing single files either – you can create share links for entire folders. You also don't have to stop at file sharing by email; your files can be shared by text message, in the DMs of a social media platform, on a messenger platform… And to complete this perfect picture of convenience, you can create and share links on whatever device you use to access your mail.com account.
File sharing OR folder sharing
Imagine you had a birthday party…wait, stop thinking about cake! Instead, imagine that you’d like to share some memories with a friend who unfortunately couldn’t make it to the event. Nothing could be easier!If you took party photos on your smartphone, great news: If you have the mail.com Mail App installed on your phone, your mail.com Cloud is right there, too! Open the mail.com mobile app and tap the Cloud tab. Now tap + and open your phone’s photo library. Tap the photos you’d like to save in your Cloud and confirm your choice. Congratulations – your photos are in your Cloud and ready to share!
Good to know: If you don’t have the mail.com app on your phone, it’s still possible to upload photos to your Cloud in your computer’s web browser using a QR code. Log in to your mail.com account and open the Cloud tab. Click Upload > Upload from smartphone and a QR code and password will appear. Use your smartphone’s camera app to scan the QR code and click on the web link that pops up. Now enter the password (located under the QR code on your browser screen) and press Verify password. Tap Select file > Photo Library, select the photos you’d like to save in your Cloud, and tap Add.
If you have several birthday photos to share with your bestie, now is the time to create a folder for them in your Cloud. That’s right, you can share a link to the entire folder! Whether you are using the web browser or mobile app, all you have to do is select Create folder, move your birthday pics there, and follow the same procedure for sharing the folder as you would to share a single file:
Creating a share link for online file sharing
Whether you are in your web browser or mobile app, your first step is to head to the Cloud tab and locate the document, photo, or folder you’d like to share. Now select it – on your computer, click the box in the upper left corner, on your phone, hold your finger on it until the check mark appears. The last step varies according to your device:- In the web browser, click Share
- In the iOS app tap More > Share
- In the Android app, tap the share symbol in the lower corner
How to share your link
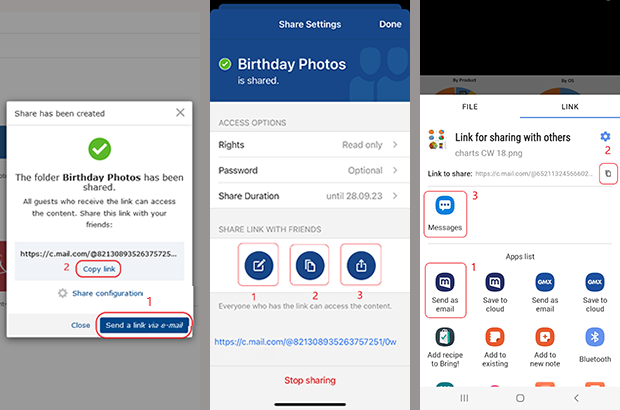
By default, your newly created file share link will expire after one year and is not password protected, and if you are sharing a folder, it is read-only. If you’d like to make some changes here, see the instructions below. But if you’re ok with these options, you’re ready to share that link!Now that you have a link to share your precious photos, you can click to automatically (1) open an email in your mail.com account containing the link, (2) copy the link to paste it into a text message or other chat, or (3) send it using the options available on your smartphone.
How to adjust your share link
What about those other sharing options before you send that link? You can do the following in the share settings:- Make the link even more secure by setting a password for opening it
- Define how long the share link will be available
- Change how long a share link is available
- Delete links at any time if you no longer want to share
But what if you change your mind after creating and sending the share? No worries – you can change the share settings later, or even deactivate the share entirely. So if you decide that picture of you scarfing down birthday cake wasn’t so flattering after all, just head back to your mail.com Cloud and click or tap All shared data. Here you’ll find a list of all active and expired share links. In your web browser, mouse over the share symbol to the right of the file name, in the mobile app open the file and tap the share symbol in the lower corner. This opens the settings for that specific file or folder, where you can make changes to your heart’s content.
Are file share links secure?
You bet! The files themselves are stored in the mail.com Cloud, which is hosted on our servers protected by state-of-the-art security and in compliance with data privacy regulations. You choose who to share the link with and can revoke the share rights at any time. If you think there is any chance that your share link could fall into the hands of an unintended recipient, you can give yourself the added peace of mind by requiring a password to view the link, as described above.What happens on the share recipient’s end?
Regardless of how you have shared the link – email, text message, etc – the cloud share process will look the same for your recipient. They click on the share link and are taken to a Cloud page where they can access the folder or file. If you have added a password, they will have to enter it before gaining access. And now your BFF can choose whether they just want to look at your photos or download them to their device. Rest assured that your recipient ONLY has access to the files you have chosen to share, not your entire Cloud. And don’t worry: they don’t have to have a mail.com account for this to work.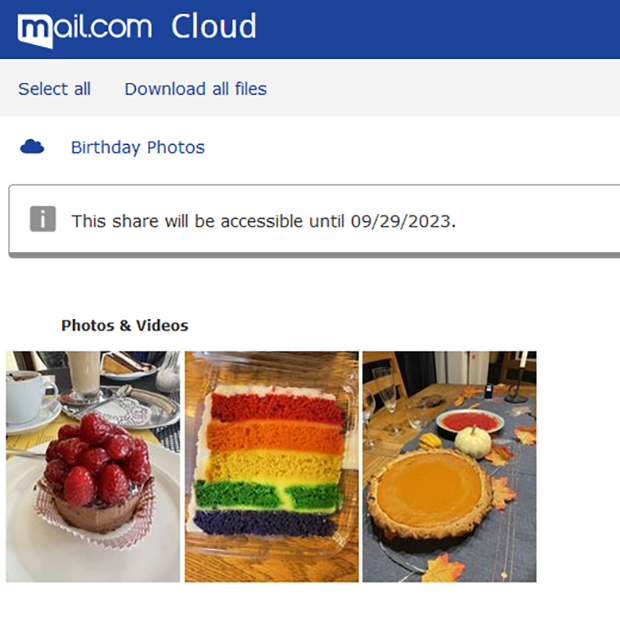
We hope you found this information useful! Before you start creating share links, leave us some feedback below!
Images: 1&1/Pexels
121 people found this article helpful.
Related articles